A strong core for a runner – a basic set of exercises
Why should runners (and not only them) exercise their torso? How to do it effectively with minimal effort? I invite you to familiarize yourself with the absolute basics of core training.
Our torso should be mobile (allow us to move) and stable (maintain some kind of “stiffness”).
The trunk muscles can be divided into superficial and deep muscles. The superficial muscles are responsible for movement, while the deep muscles are responsible for stability. It is the efficiency of the latter that will determine good central stabilization, i.e. the so-called CORE stability. Deep muscles provide adequate trunk control both statically and dynamically.
What does it mean? A strong torso will enable us to maintain correct posture in static positions (in which, unfortunately, we spend too much time) and ensure proper distribution of loads during movement. Each movement of the upper or lower limb should start with a properly stabilized (tense) torso.
To put it very simply, in virtually every overuse injury, the risk factor is something not moving or moving too much. In the case of running, it may be not only the ankle or hip joint, but also the spine.
I would now like to focus more on the lack of adequate “stiffness” of the torso. CORE training is a basic element of EVERY physiotherapy training – this means that regardless of the patient’s injury/problem, we should include the deep muscles of the torso in the training program – they are so important in the context of our functioning.
Planes of movement
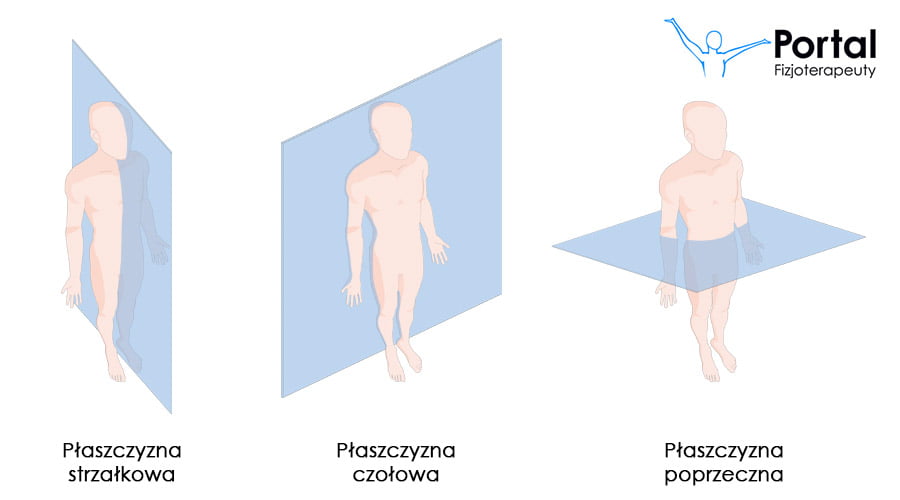
We can describe the movement of our body in relation to 3 planes:
– sagittal – dividing the body into left and right, we perform flexion and extension movements of the trunk;
– frontal – dividing the body into front and back, we perform side bends of the torso;
– transverse – dividing the body into upper and lower, we perform rotational movements of the torso.
More about planes and their role at the end of the article.
How to tighten CORE?
Before starting any movement, it is necessary to activate the trunk muscles. It is simple – just tighten your abdominal muscles and buttocks. This is the most up-to-date concept of CORE stability training. You won’t find anything here about sucking in your belly or sticking your navel to your spine.
Dictionary of used abbreviations:
PW – starting position – initial position during the exercise,
R – movement performed during the exercise,
PK – final position – position after the movement.
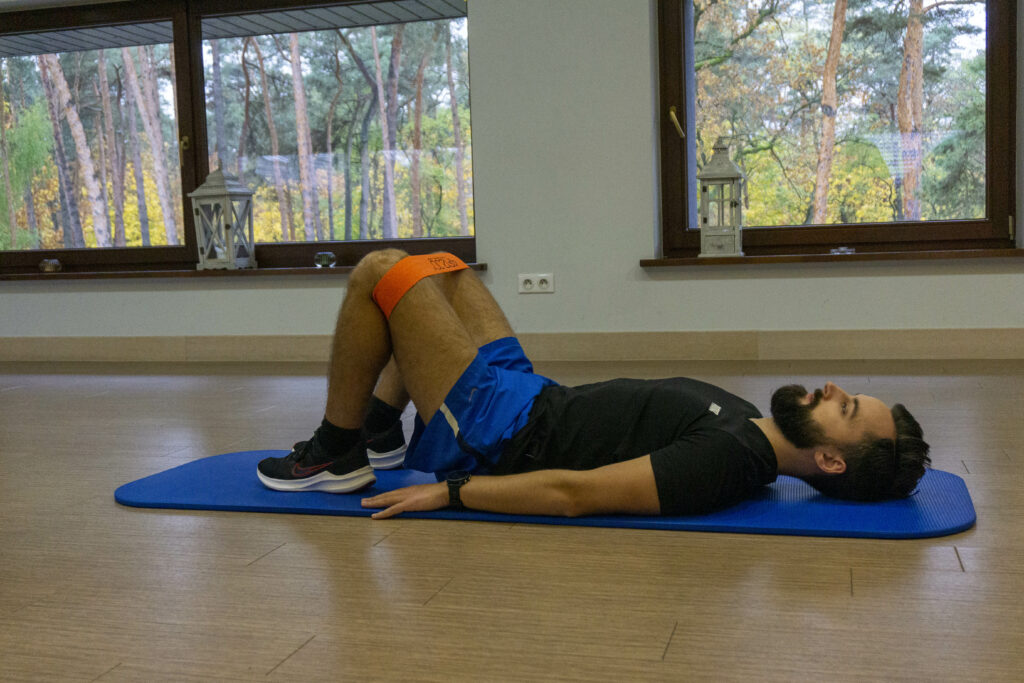
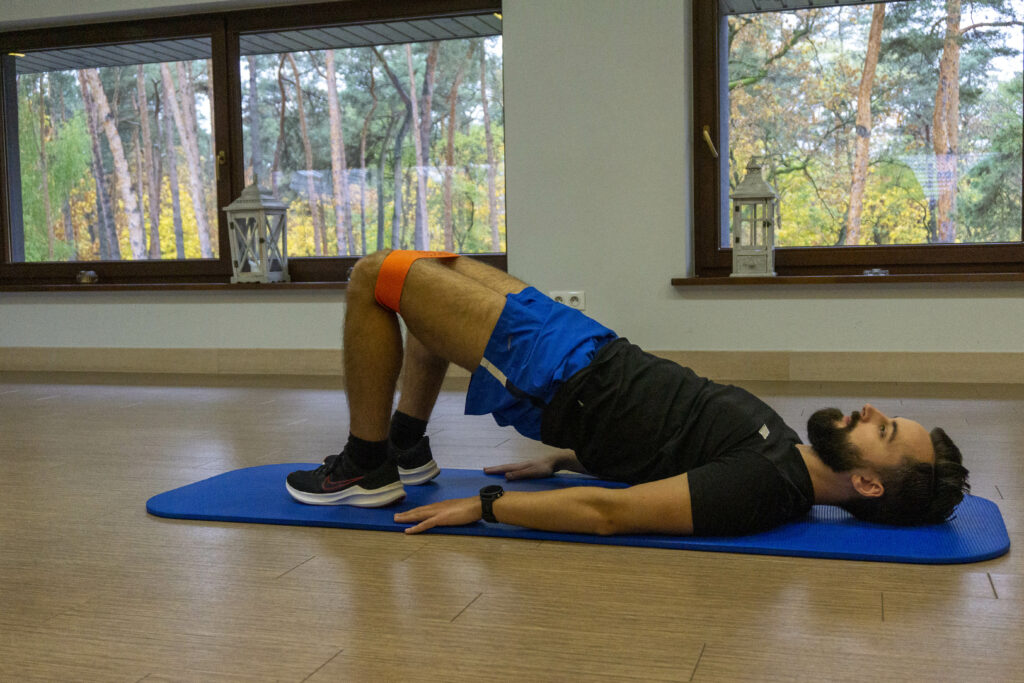
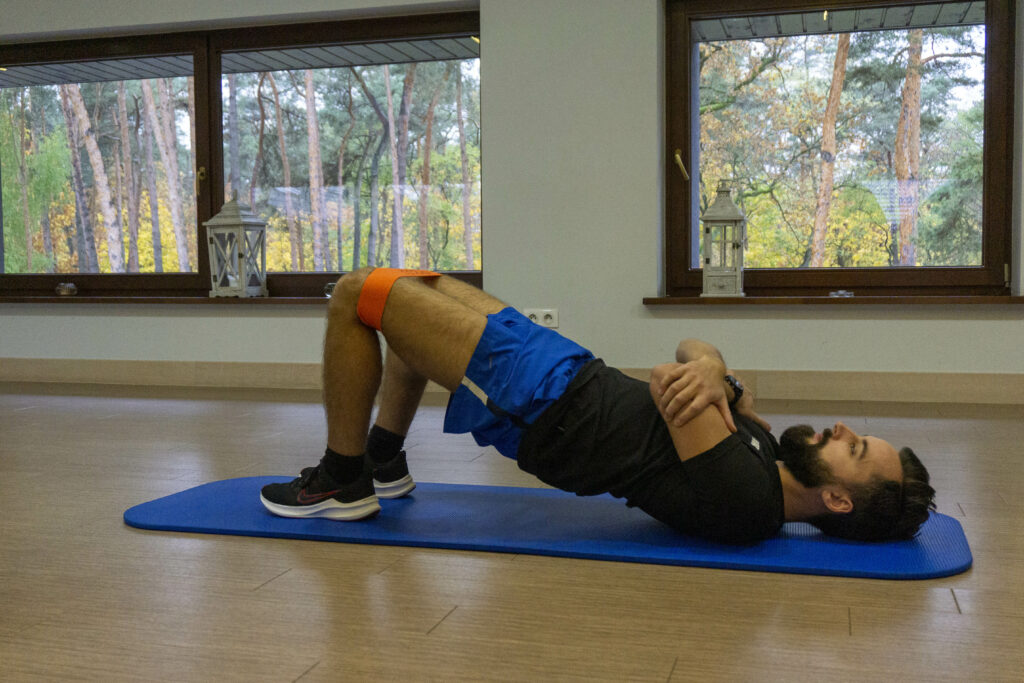
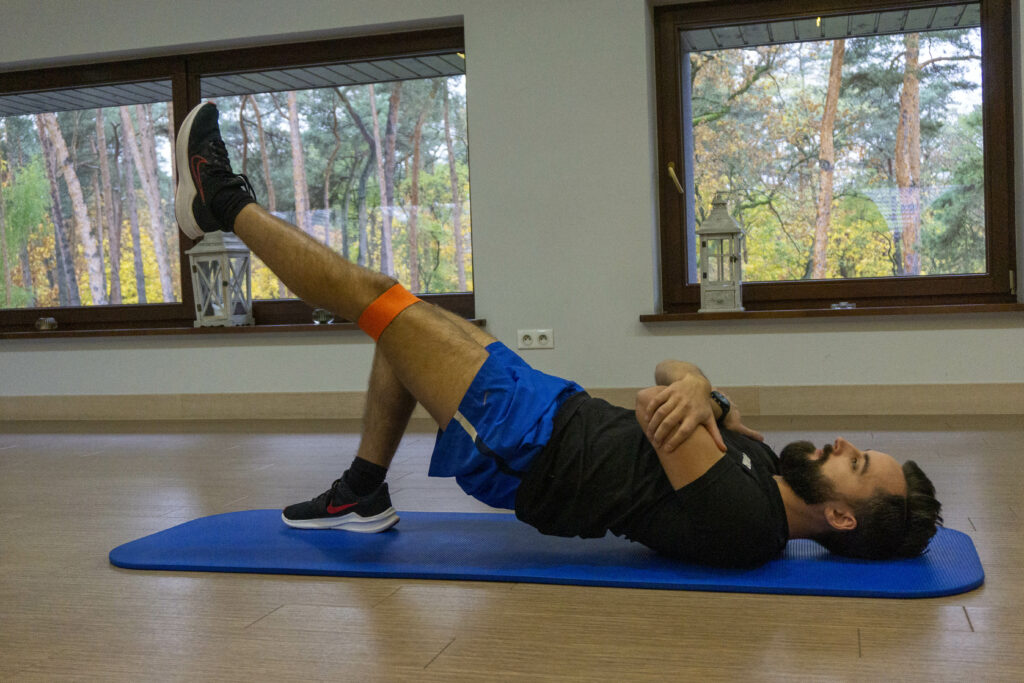
Hip bridge
PW: lying on your back, legs bent as much as possible (heels as close to the buttocks as possible), arms along the body.
R: tighten the abdomen and buttocks -> lift the hips up.
PK: return to PW -> relaxation of the abdomen and buttocks.
Comments:
– stabilization in the sagittal plane,
– a tight tape on the knees is not necessary, but it will allow additional involvement of the gluteal muscles,
– the heels next to the buttocks will allow you to isolate the work of the gluteus maximus muscle, the further the heels are, the more the hamstring group helps in movement,
– maintaining the tension of the abdominal muscles during movement will prevent excessive work of the lumbar muscles – in CP the torso is in a straight line with the thighs, it should not create an arc (hyperextension in the lumbar region),
– a great exercise to relieve the (usually overloaded) lumbar section,
– crossing your hands on your chest will prevent the strong latissimus dorsi muscle from working -> progression 1.
– crossed hands + extension of one of the legs in PW will turn the exercise into multi-plane stabilization -> progression 2.
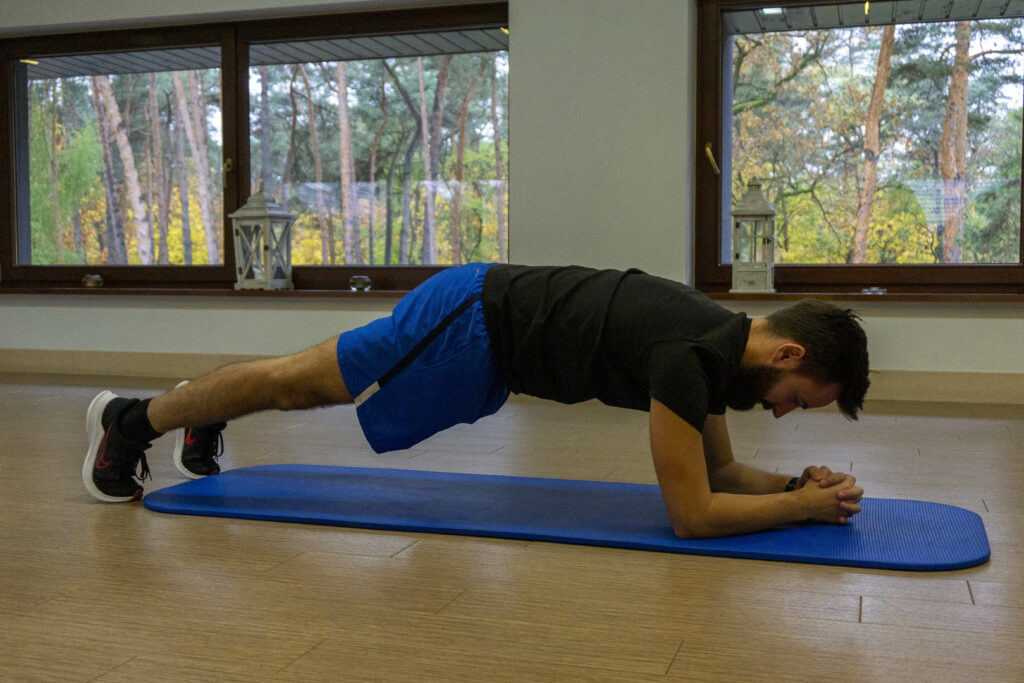
Half plank/plank
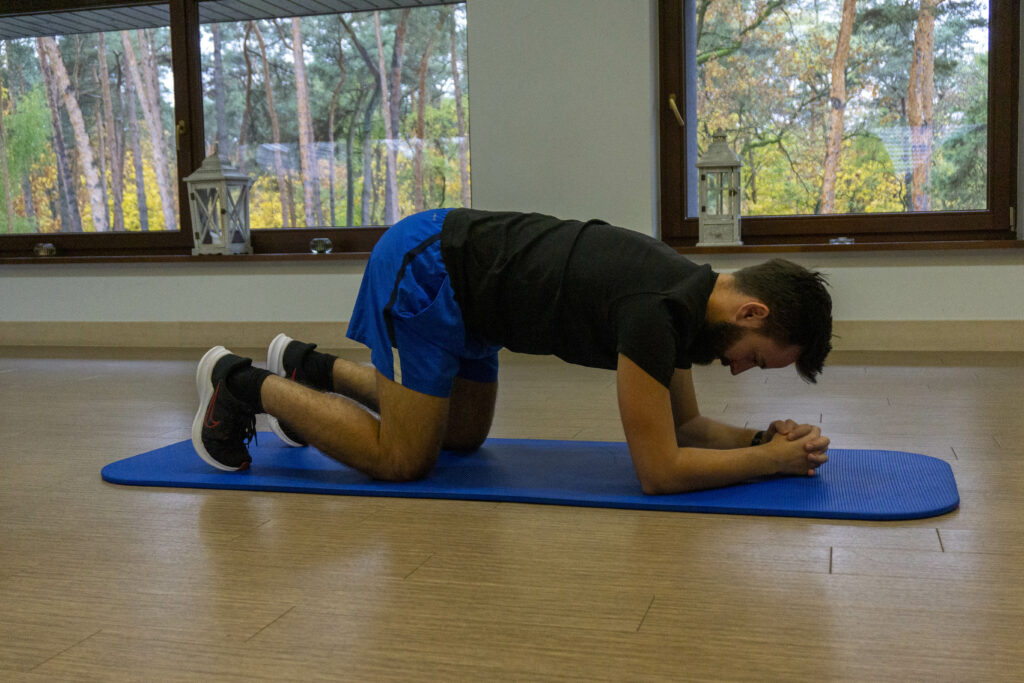
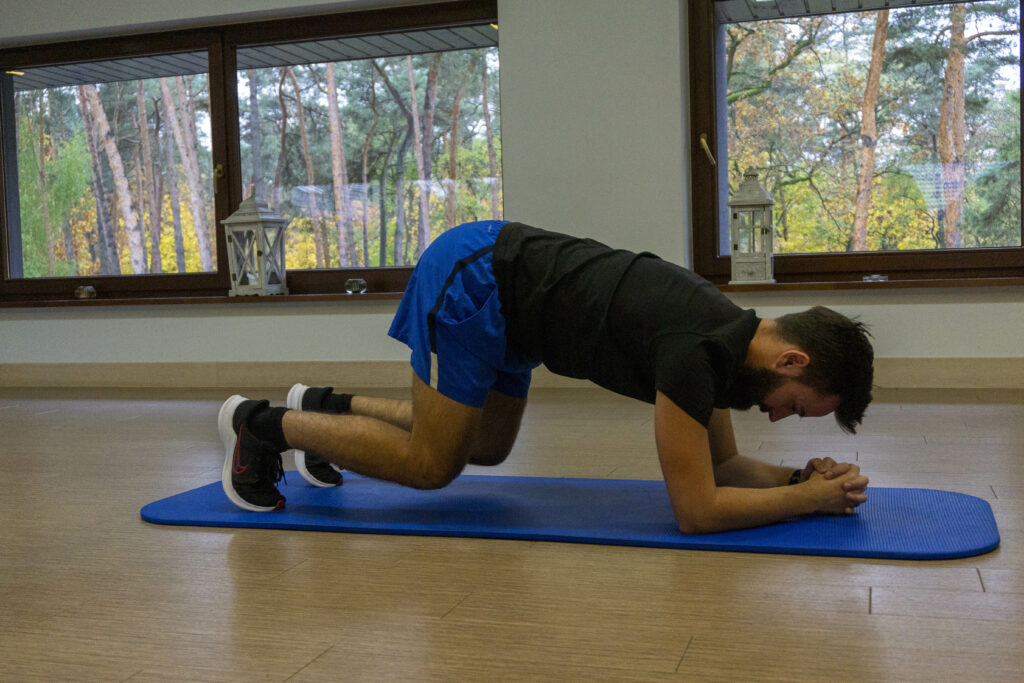
PW: kneeling on the forearms, toes curled, head in extension of the body, chin slightly retracted.
R: tighten the abdomen and buttocks -> raise the knees up -> hold the position for 10 seconds.
PK: return to PW -> relaxation of the abdomen and buttocks.
Comments:
-stabilization in the sagittal plane,
-maintaining muscle tension will prevent lumbar hyperextension (the most common mistake = lack of active tension),
-the greater the distance between the knees and the elbows, the greater the load,
-full plank -> progression.
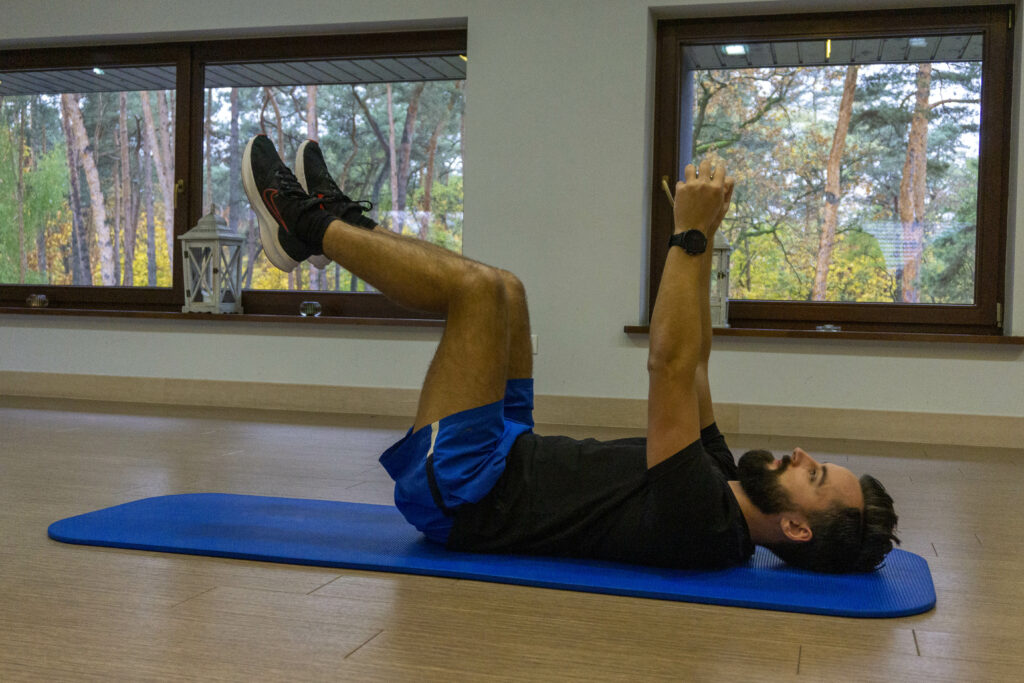
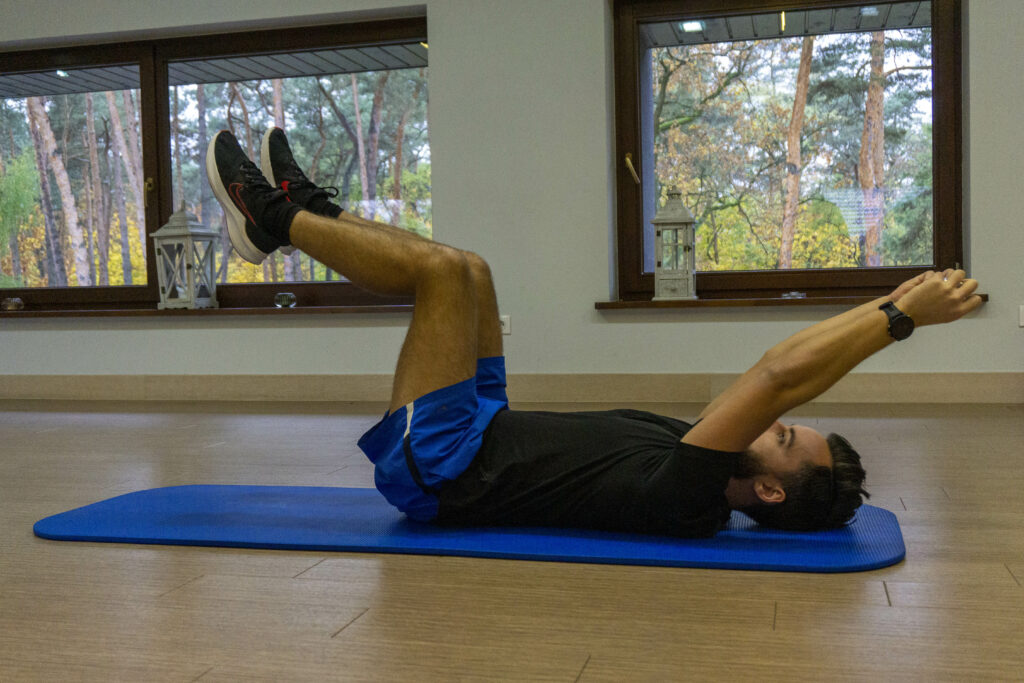
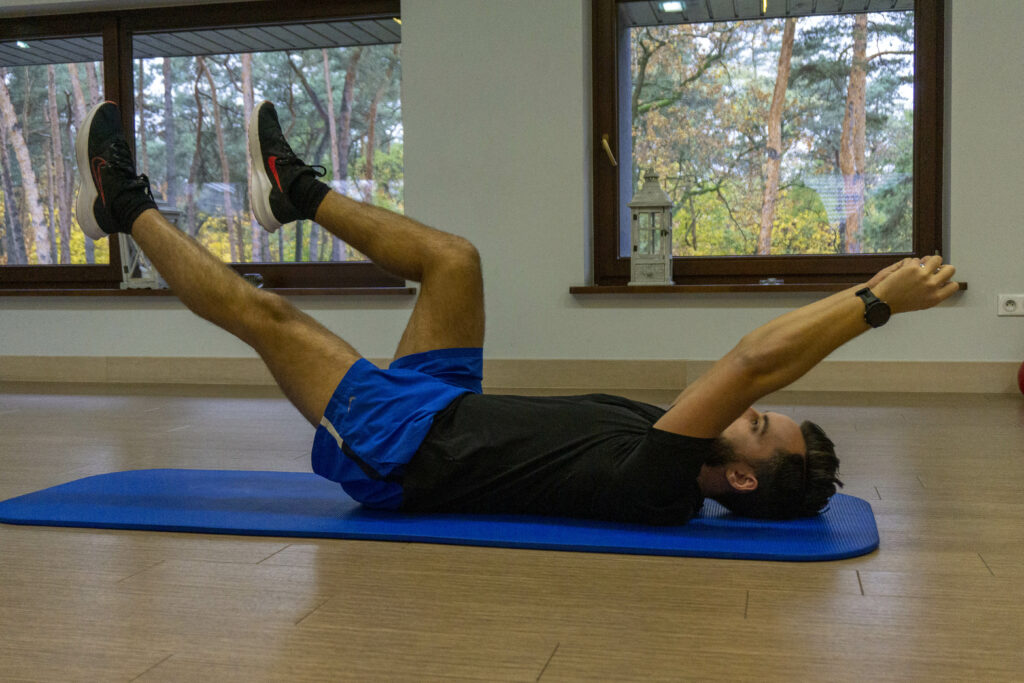
Dead bug
PW: lying on your back, weight in your hands (1-2 kg for starters).
R: tighten the abdomen and buttocks -> raise your hands in front of you -> raise your bent knees up -> transfer the weight to your head.
PK: after completing the series, return to PW -> relaxation of the abdomen and buttocks.
Comments:
– stabilization in the sagittal plane,
– (easier) alternative to half plank/plank,
– there are many versions of the exercise, the key is to keep the torso in a stable position (without hyperextension in the loins),
– the greater the range of work of the arms or legs, the greater the load,
– alternating straight legs -> progression.
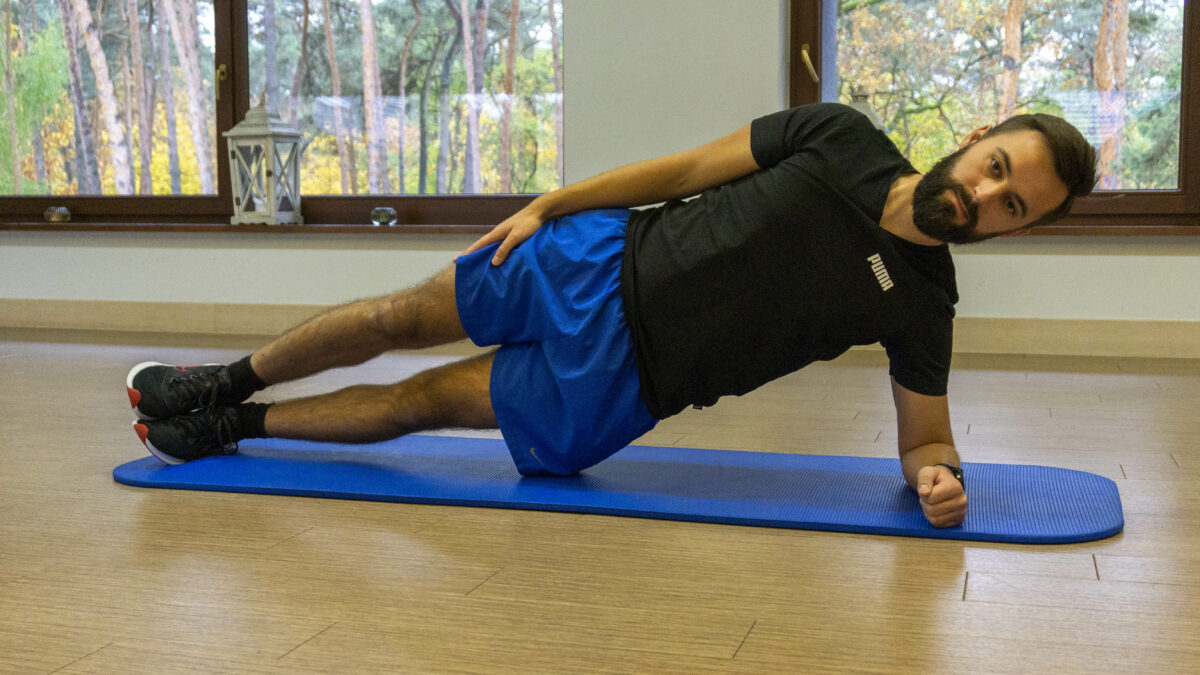
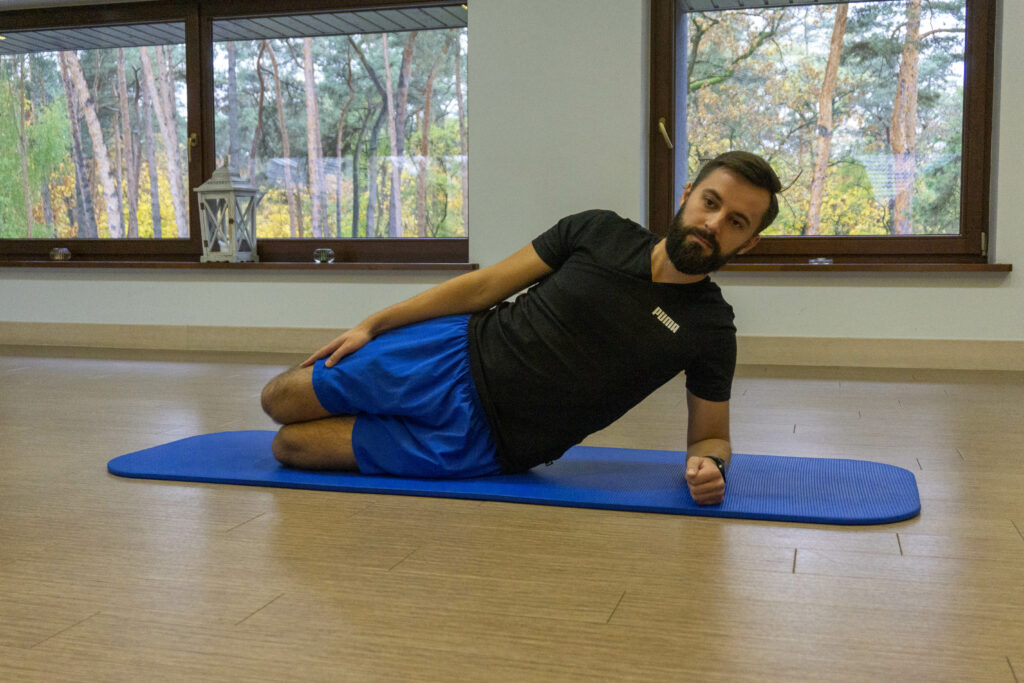
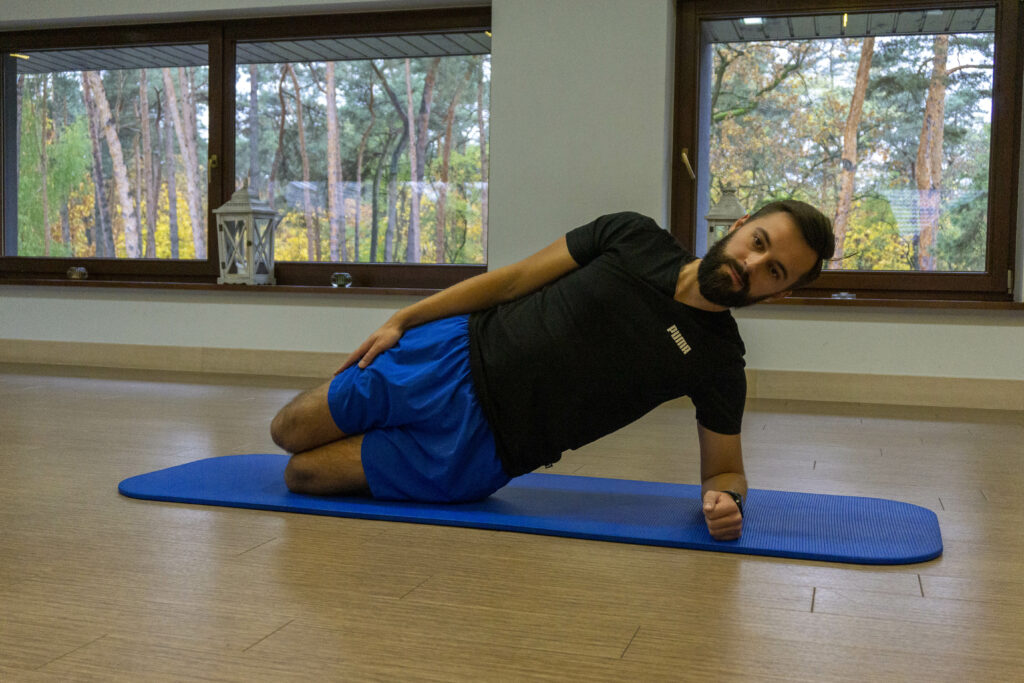
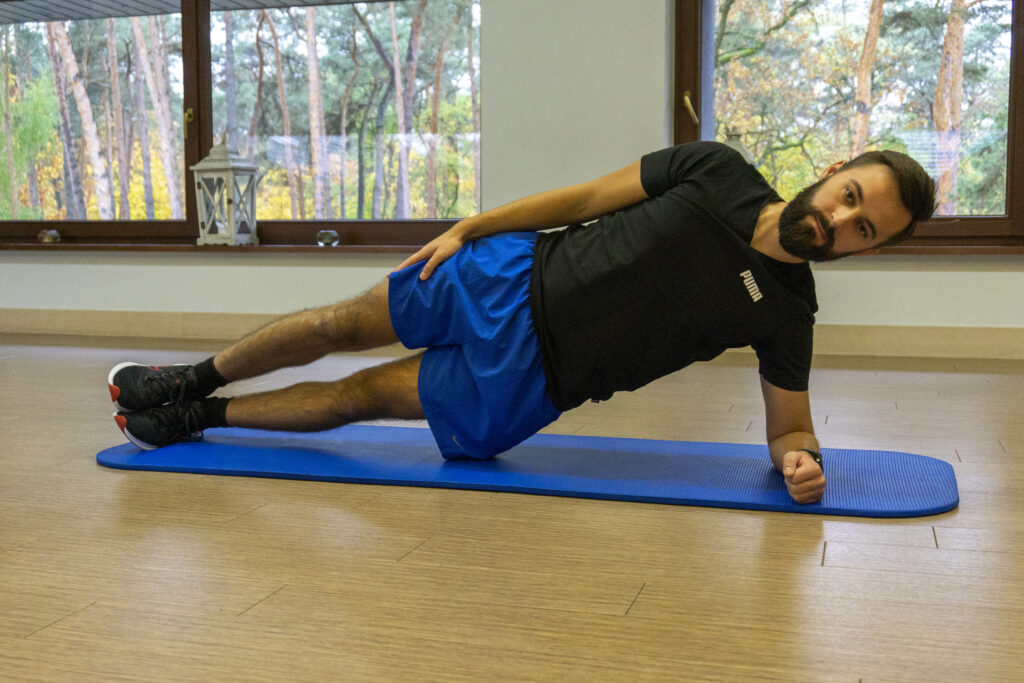
Side plank (short and long lever)
PW: support sideways on the forearm, the “top” hand along the torso marks a straight line, knees bent at right angles, head in extension of the torso.
R: tighten the abdomen and buttocks -> lift the hips up (the arm and torso should form a right angle)
-> hold the position for 10 seconds.
PK: return to PW -> relaxation of the abdomen and buttocks.
Comments:
– stabilization in the frontal plane,
– the torso should form a straight line – a common mistake is the lack of a neutral spine position (hips at the back, back bent),
– a very important exercise for people with back pain, but it is quite demanding and it is worth working on stability in the sagittal plane first,
– exercise is not recommended for people with shoulder pain,
– full extension of the lower limbs (long lever) -> progression.
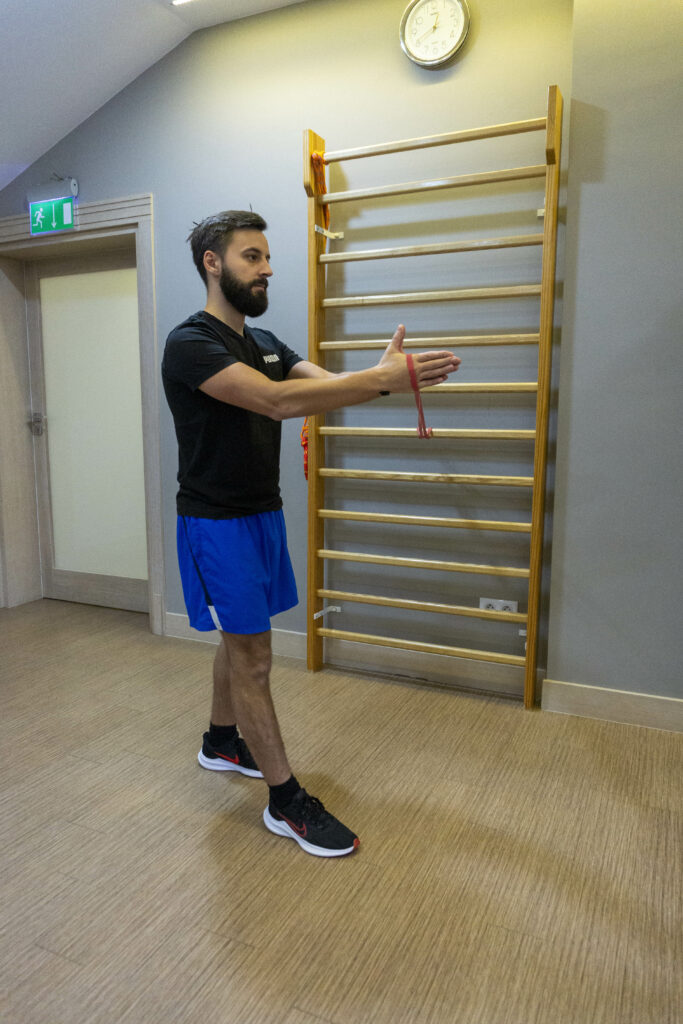
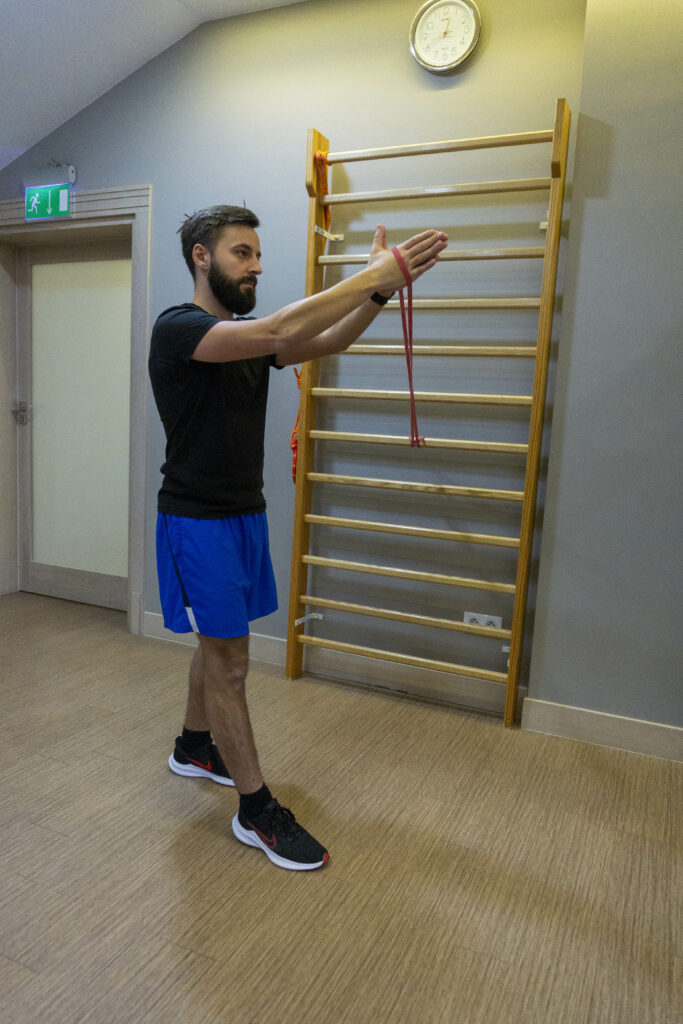
Pallof press
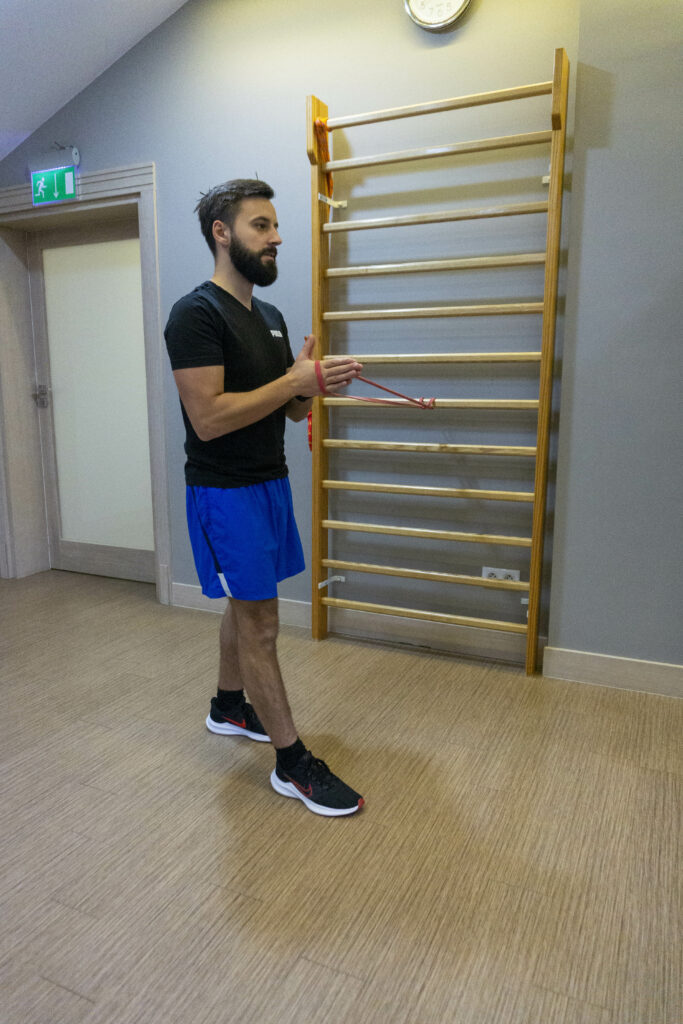
PW: standing position, strap at the height of the sternum (attached to the hands), “outside” foot in a lunge.
R: tension of the abdomen and buttocks -> shifting the center of gravity to the rear leg -> moving the hands in front of you, keeping them in the plane of the sternum.
PK: after completing the series, return to PW -> relaxation of the abdomen and buttocks.
Comments:
– stabilization in the transverse plane,
– the greater the belt tension, the greater the load,
– additional hand raise to head height -> progression.
Bird dog
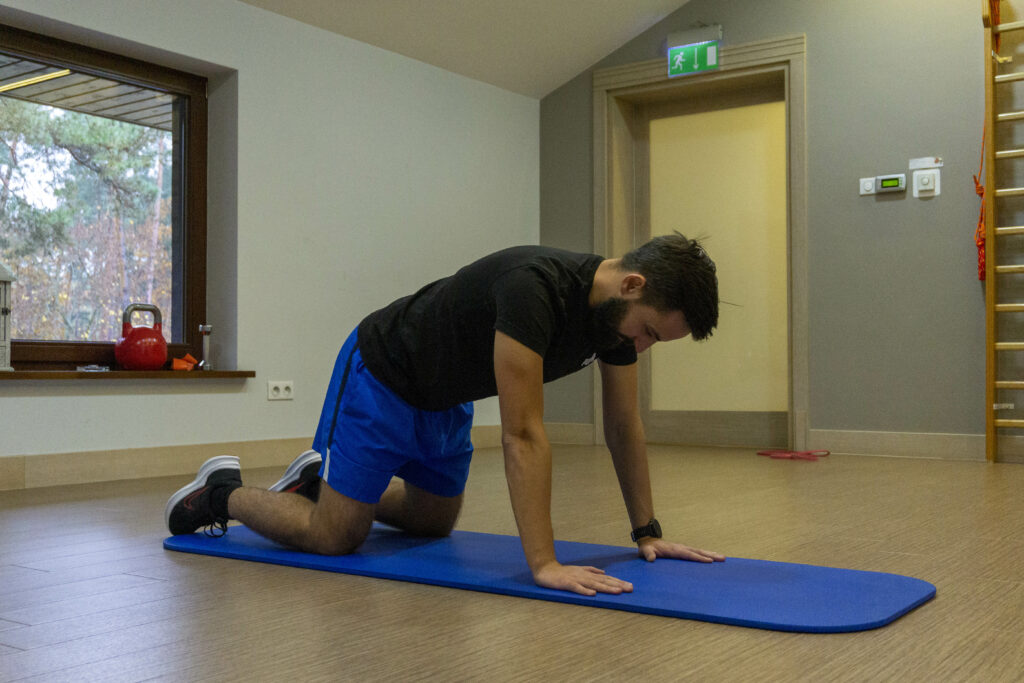
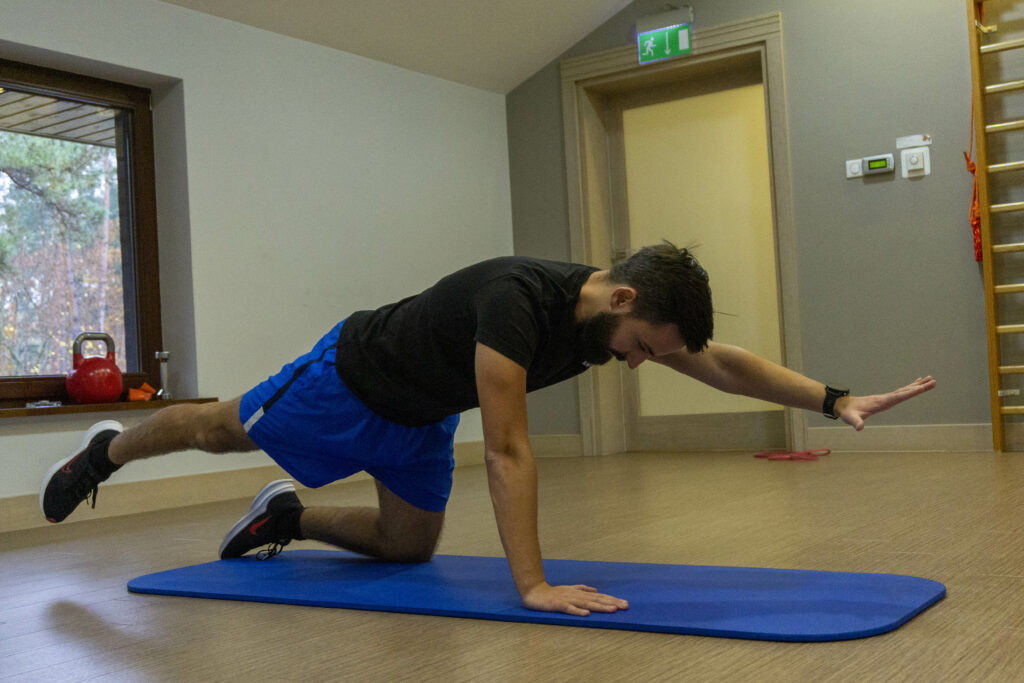
PM: kneeling on hands, head in extension of the body, chin slightly retracted.
R: tighten the abdomen and buttocks -> raise the hand and leg on the opposite side -> hold the position for 10 seconds.
PK: return to PW -> relaxation of the abdomen and buttocks.
Comments:
– multi-plane stabilization,
– most common mistakes: failure to maintain muscle tension/lifting the leg too high = lumbar hyperextension.
How to use the exercises?
You should test yourself in exercises in all areas and, if necessary, focus on those in which we see asymmetry between the sides or are difficult for us – this way we will detect our weaker elements. It is worth sticking to one exercise for each level that we can perform technically well, but which is still some effort for us. If a given exercise is not burdensome for us, it is worth considering progression. I have provided the names of the exercises in English, which will make it easier to find their videos on the Internet (and their possible further progressions).
Time/number of repetitions:
– position maintenance exercises (planks, bird dog): 8 repetitions of 10 seconds (or 4 on each side),
– movement exercises (dead bug, pallof press): 3 sets of 15 slow repetitions (or 2×15 repetitions on each side).
Sample set of exercises:
Training 2×/week:
– hip bridge (hands crossed on the chest) 3×15 repetitions,
– plank 8×10 seconds,
– side plank 4×10 seconds on each side,
– pallof press 2×15 repetitions on each side.
The above set consists of 4 exercises that should take about 15 minutes. This is time that is really worth devoting to your CORE training.
The author of the text is M.A Kamil Wasielewski – Columna Medica physiotherapist. In his work, he specializes in diagnosing and treating patients with spine and joint pain. Amateur runner, enthusiast of long-distance hiking mountain rallies.
