Exercises for people who do sedentary work
Sedentary work and a sedentary lifestyle contribute to the development of pain in the musculoskeletal system. The development of civilization has enabled us to limit our activity to an absolute minimum, and yet we were created to move! We work remotely from home (we don’t even have to go to the office anymore), we order meals for delivery, and we spend our free evenings on streaming platforms. It is only a matter of time before ailments related to lack of exercise (or too much intensity, inadequate to our capabilities, e.g. when we go to the mountains) develop.
What is the solution to this problem? Move! The purpose of this article is to present a few simple exercises for people whose work involves a sitting position. However, it should be remembered that a few exercises during work will not solve the existing problem and will not fully protect us from ailments. The given set is intended to reduce the risk of the above-mentioned conditions and keep our body in proper mobility. In addition, we should lead an active lifestyle and if any ailments occur, we should see a specialist for appropriate diagnosis.
How to use the kit below? Currently, it is believed that we should not sit continuously for longer than 30 minutes. These guidelines are, however, a bit utopian, but let’s be honest, taking a short break from work once an hour should not be a problem that will distract us from our tasks. The given exercises can be performed during this break. We don’t have to do the whole set, we can focus on selected parts of the body that are usually problematic for us. The number of repetitions is approximate, the movement should be repeated until you feel relaxed and depending on your “degree of stiffness”, the number of repetitions may be different.
Exercise 1. Correction of head and neck position. This movement will also be an element of other exercises. The task is simple – gently pull the chin back so that the head is in extension of the body. This is the correct position for the cervical spine (as opposed to the forward position it is usually in). It is worth paying attention to the position of the head in relation to the body during the day, especially when sitting.
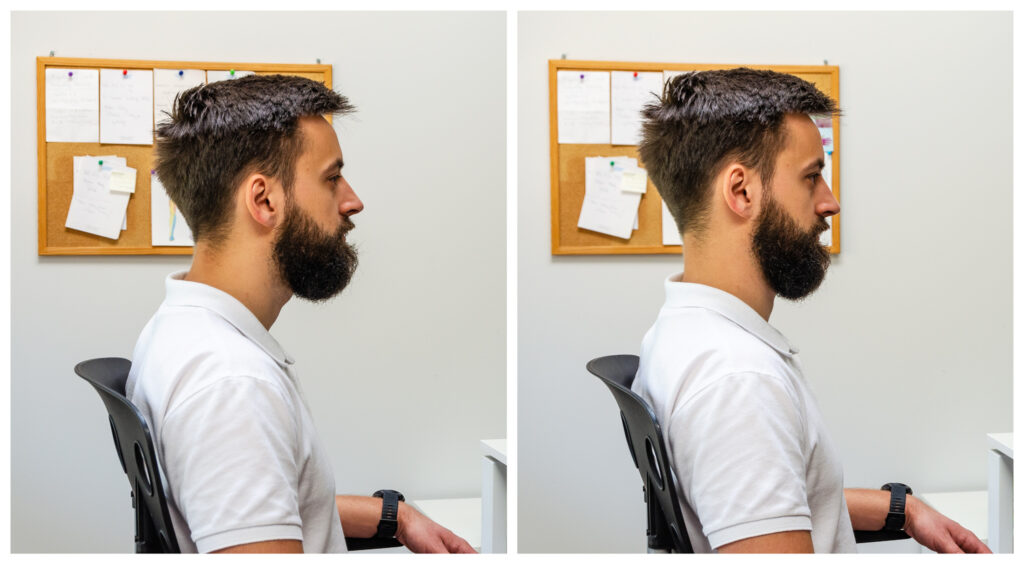
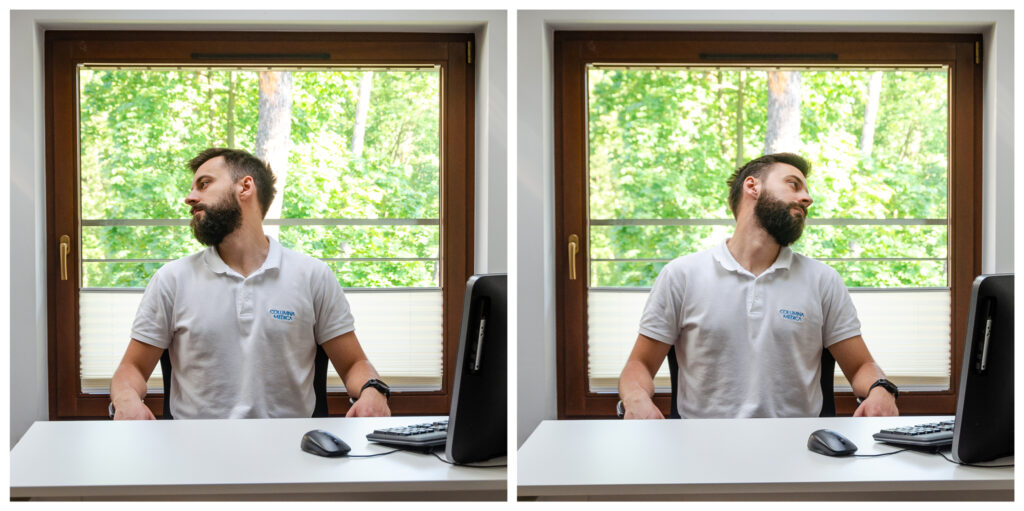
Exercise 2. “Pouring water out of your ears.” The exercise allows you to maintain the appropriate range of motion of the cervico-thoracic transition, which is almost always stiff in the case of neck pain.
We withdraw the beard as above. and – maintaining this position – we slowly rotate our head as much as possible with a backward movement, as if we wanted to pour water out of our ears. We perform 10 turns on each side.
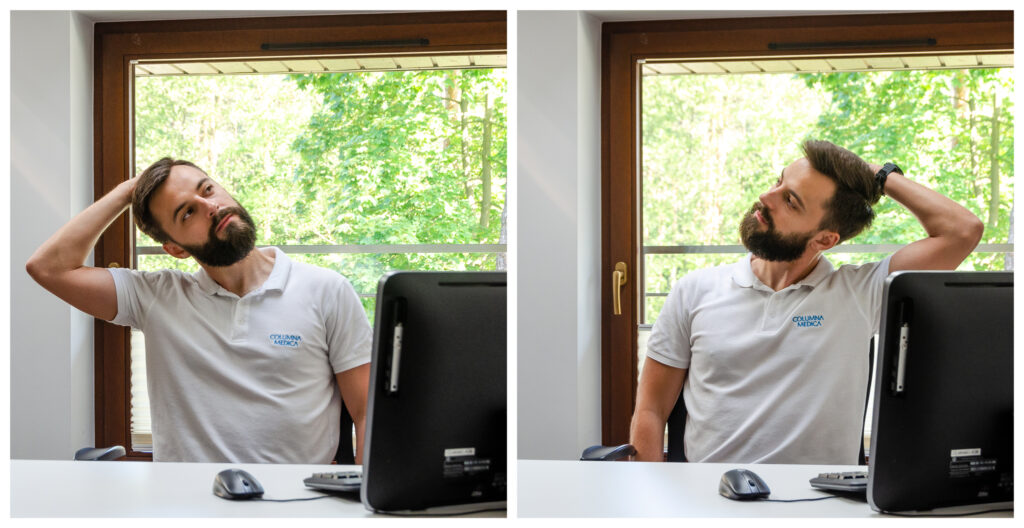
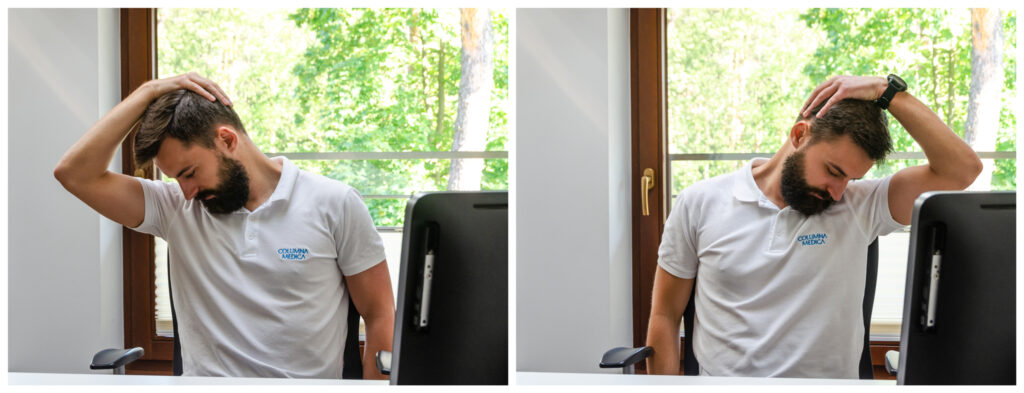
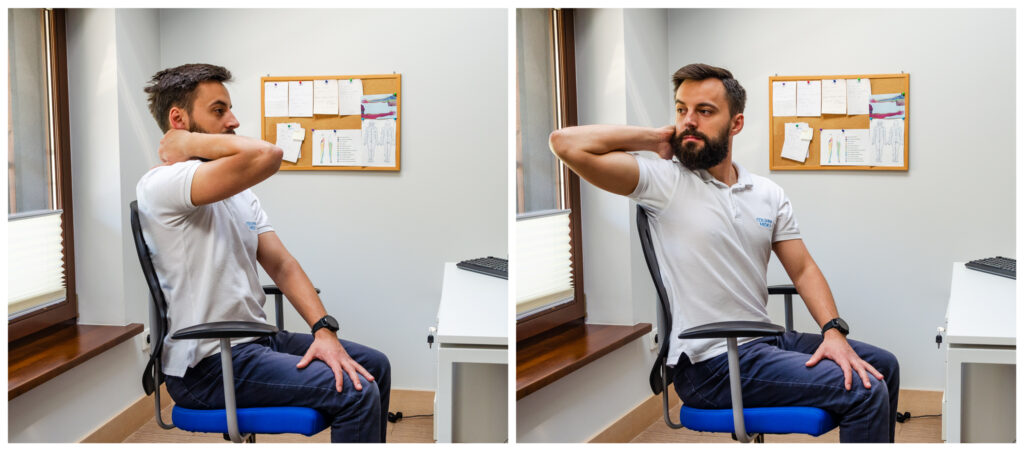
Exercise 3 “Ear to armpit” – stretching the hoods (the descending part of the trapezius dorsi muscle). These are often tender and painful muscles that can limit the mobility of the cervical spine and cause headaches.
During the exercise, we retract the chin, perform a sideways head tilt (ear to shoulder, but without lifting the shoulder) and rotate the head in the opposite direction (“look at the plane behind you”). It is important to maintain the previously selected inclination while turning the head. The hand on the back of the head gently pulls the ear towards the armpit – to a slight feeling of stretching along the muscle. We don’t want to go into extreme stretching, and the movement shouldn’t be painful either. Maintenance time: for our needs, 15 seconds on each side, but effective stretching (= increasing mobility) will be achieved after about a minute.
Exercise 4. “Nose to armpit” – stretching the levator scapulae muscle. Another key element of the cervical spine that may also cause limited mobility and headaches.
We bow our head and turn it in the same direction. The hand on the back of the head gently pulls the nose towards the armpit. The effect should be a slight stretch between the neck and the top of the shoulder blade. Maintenance time as above: for our purposes, 15 seconds on each side (increasing the range >1 min).
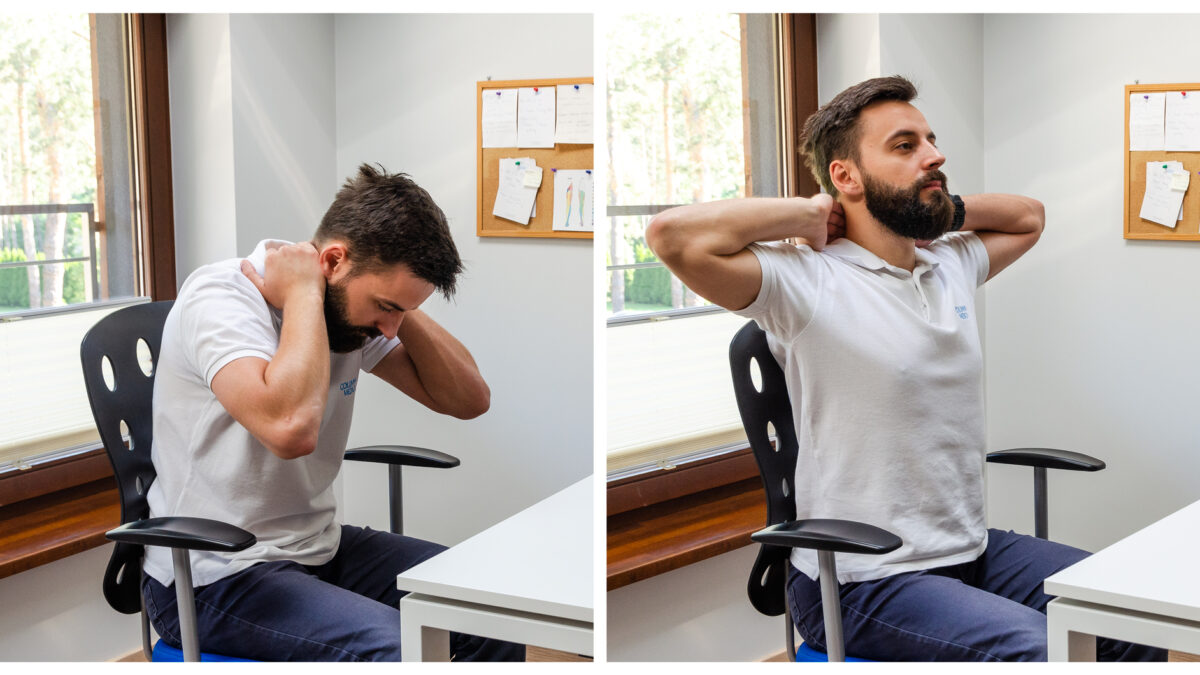
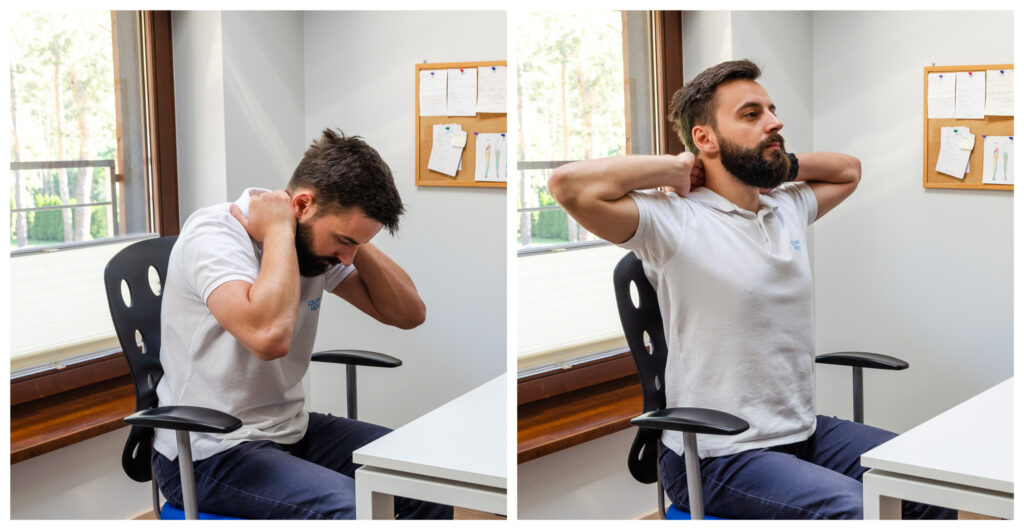
Exercise 5 Mobilization of extension in the thoracic and cervicothoracic spine. Very important movement in two areas that are crucial and usually stiff due to the hunched sitting position.
We clasp our hands around the neck and, from a slightly hanging position, we stretch our chest forward while keeping our elbows apart. The fingers on the back of your neck gently pull your neck up and forward. We perform 10 full and slow movements.
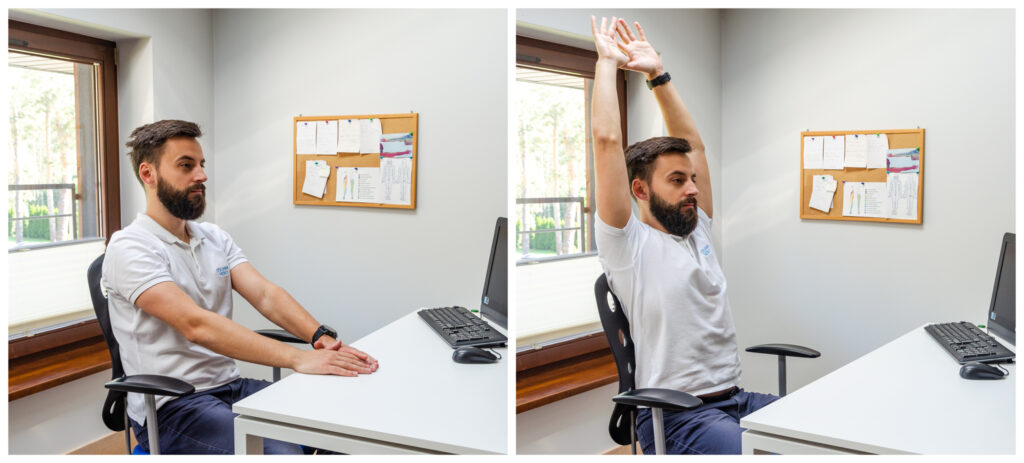
Exercise 6. Mobilization of the thoracic spine for extension. An alternative to the previous exercise. The exercise does not focus on the neck like the previous one, but the movement of straight upper limbs gives good leverage to work on the mobility of the thoracic spine.
We bring our back to the support and raise both upper limbs as far as possible behind us. We perform 10 full and slow movements.
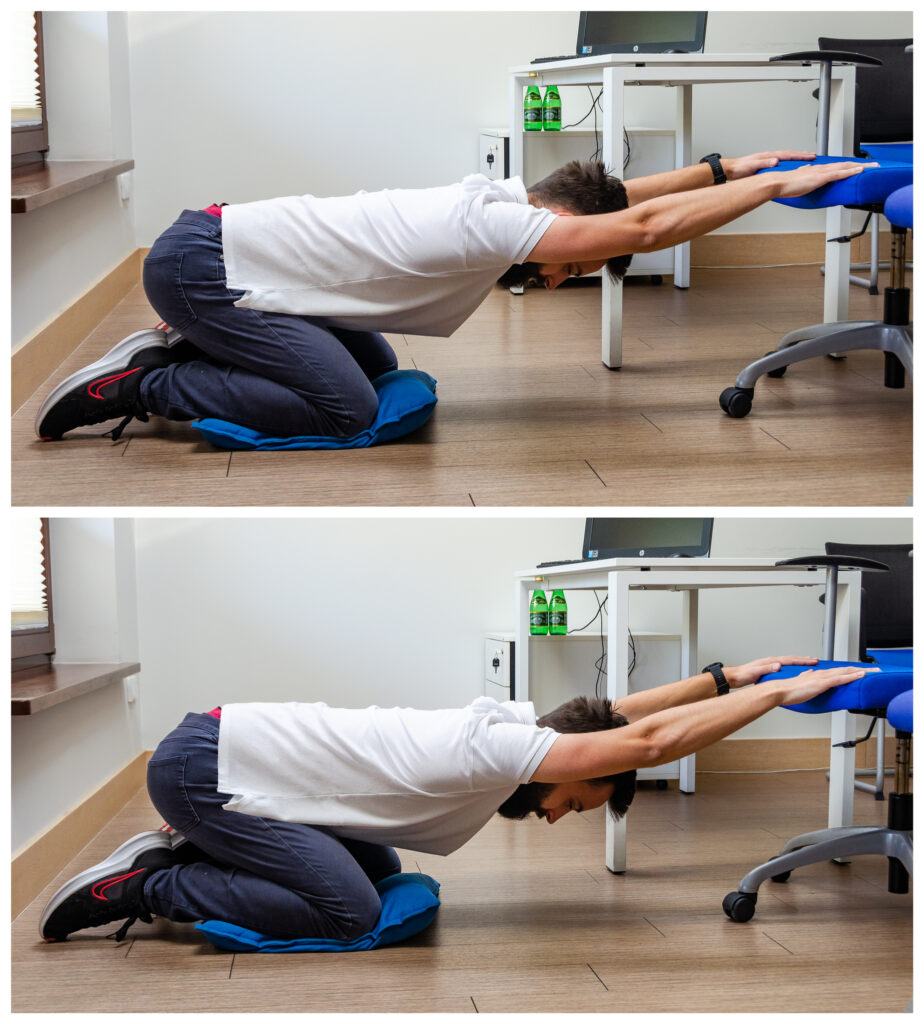
Exercise 7. Mobilization of the thoracic spine for extension. Another alternative to the previous two exercises. It requires a little more space, I usually recommend it to patients to take it home at the end of the day after work in a sitting position. Additionally, this exercise also stretches the pectoral muscles, which are often shortened.
We sit on our heels in a kneeling position (for comfort, a pillow under our knees, which should be wide to allow greater movement in the hips), hands supported on a chair or bed, chin pulled back. Movement: “bridge to the floor”. We can hold the extreme position for 30 seconds or make 10 full and slow movements.
Exercise 8 Mobilization of the thoracic spine for rotation. Another key movement in this area, unfortunately often underestimated, because the thoracic section itself rarely causes discomfort, but often contributes to problems in the neck and lower back. If you have a “concrete” thoracic section due to your office work, and you also run, you overload the previously mentioned areas.
We place our hand on the knee on the opposite side, the other hand on the neck. Movement: turning the head and torso towards the hand on the neck (keeping the hand on the knee). We perform 10 movements on each side to the full extent possible.
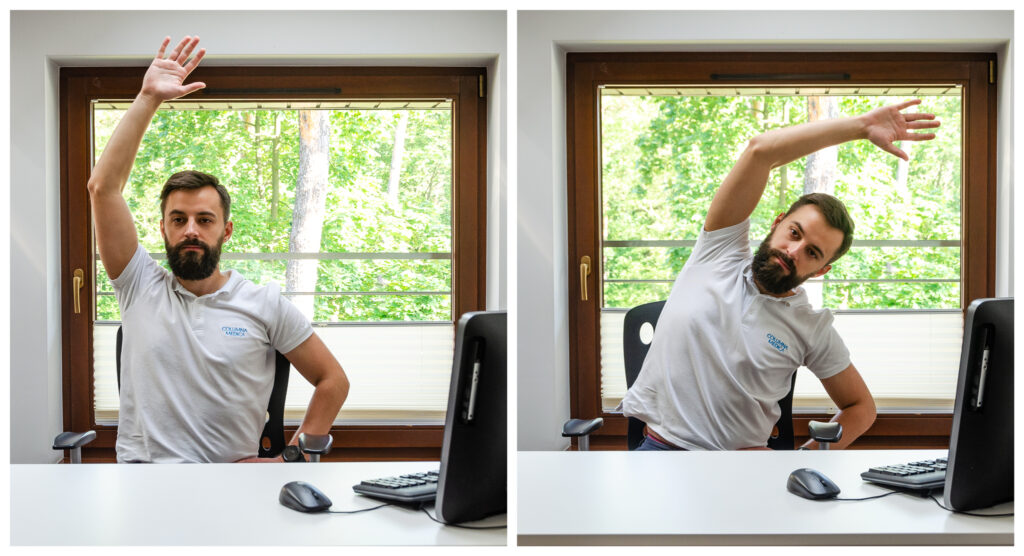
Exercise 9. Mobilization of the lumbar spine. A simple exercise that forces our backs to move in a way they don’t usually have to do.
We place one hand on the hip, the other straight up. Movement: side bend. We perform 10 movements in each direction to the full extent.
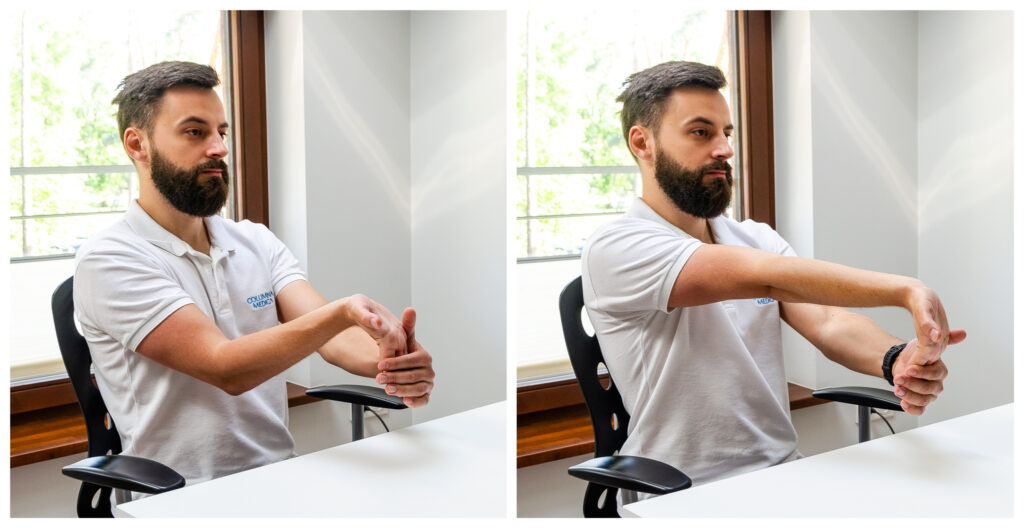
Exercise 10. Stretching the finger and wrist flexors. Another problematic area for people working at a desk.
The back of the hand is facing the floor, the elbow is slightly bent, and the other hand is gripping the toes. Movement: elbow extension with the other hand stretching the fingers towards each other. You should feel a pull along your forearm. We hold the position for 15 seconds on each side (or over a minute if we want to increase the range of wrist mobility).
Exercise 11. An alternative to the previous exercise. We stretch both sides at once with the possibility of much greater intensity.
The entire hand rests on the table with the fingers turned as far as possible towards us. Movement: shifting the weight backwards while selecting a wrist movement (stretching the wrist flexors) or selecting a movement in the wrists and lifting the pastern (stretching the wrist and finger flexors). We hold the position for 15 seconds (or >1 min).
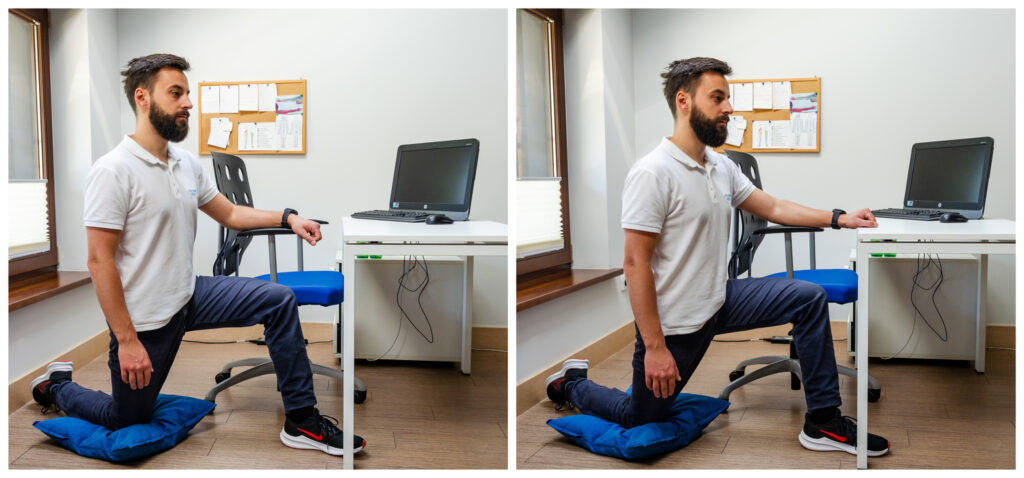
Exercise 12. Stretching the iliopsoas muscle. One of the key muscles in the context of lumbar ailments. The sitting position predisposes to its shortening, which indirectly affects the positioning and loads in the lumbar-sacral section.
We assume a one-legged kneeling position, tense our abdomen (especially important, we must maintain a neutral lumbar position to stretch the hip, not the spine). Movement: we move the torso forward to the front leg. You should feel a stretch in the front of your hip. We hold the position on each side for 15 seconds (or >1 min).
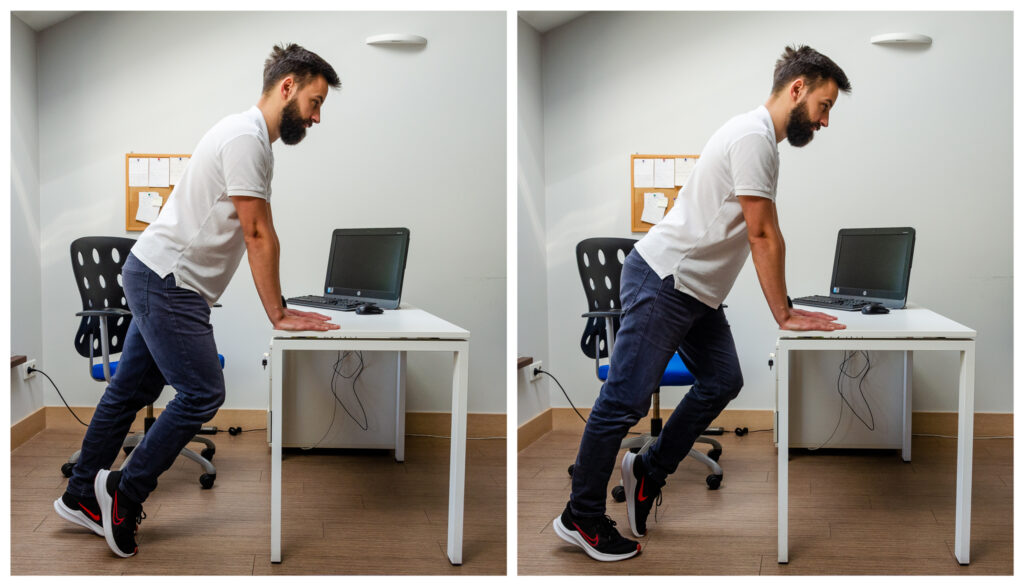
Exercise 13. Alternate toe raises – calf activation. Sedentary work reduces blood flow in the lower limbs, which contributes to circulatory problems in this area. It is in the calves that clots most often form. They are not necessarily dangerous locally, but their detachment may be life-threatening in certain situations (e.g. if the detached clot reaches the blood vessels in the lungs).
The exercise is simple, we can lean on the desk and alternately climb on our toes for 30 seconds. An even simpler alternative will be a regular walk, which will force our calves to work.
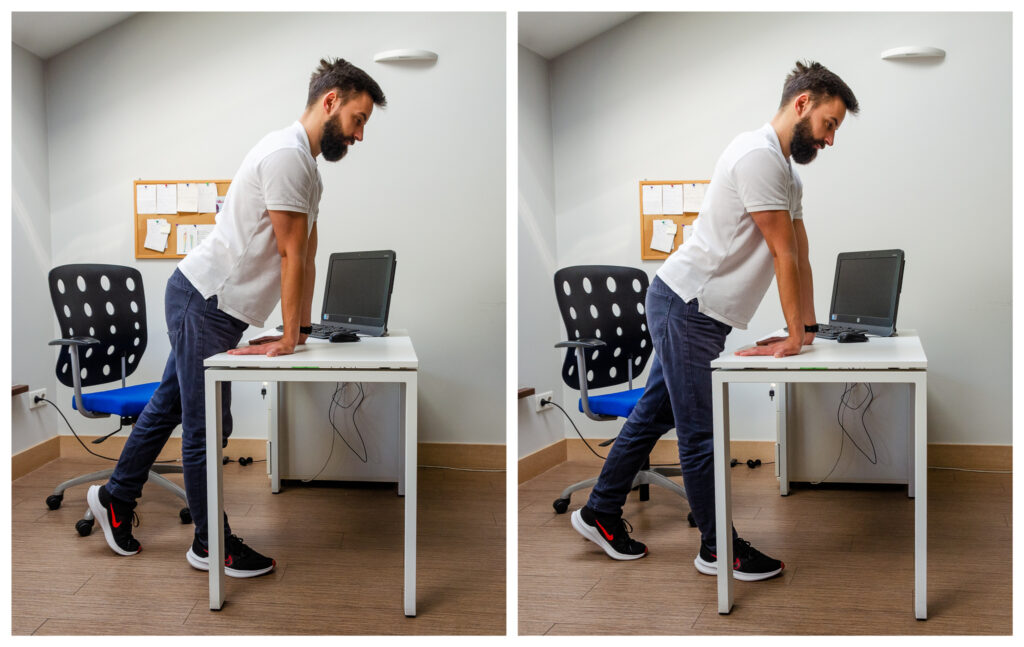
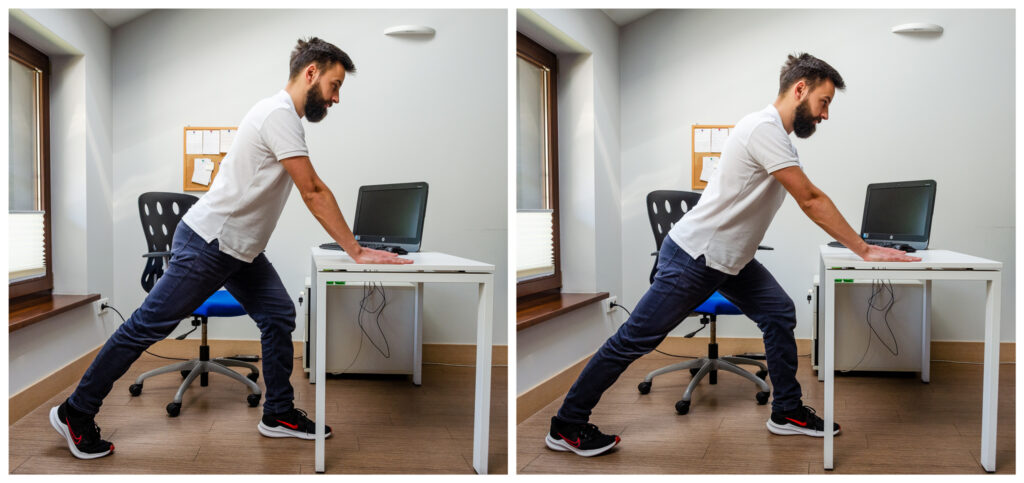
Exercise 14. Stretching the calf muscles. Important for the same reasons as the previous exercise.
We support ourselves with our hands on the desk, with our back leg straight at the knee and on our toes. Movement: shifting weight to the heel of the back leg. We should feel a stretch in the calf. We hold the position on each side for 15 seconds (or >1 min).
The author of the text is M.A. Kamil Wasielewski – a Columna Medica physiotherapist. In his work, he specializes in diagnosing and treating patients with spine and joint pain. Amateur runner, enthusiast of long-distance hiking mountain rallies.
